MindE FatFilter
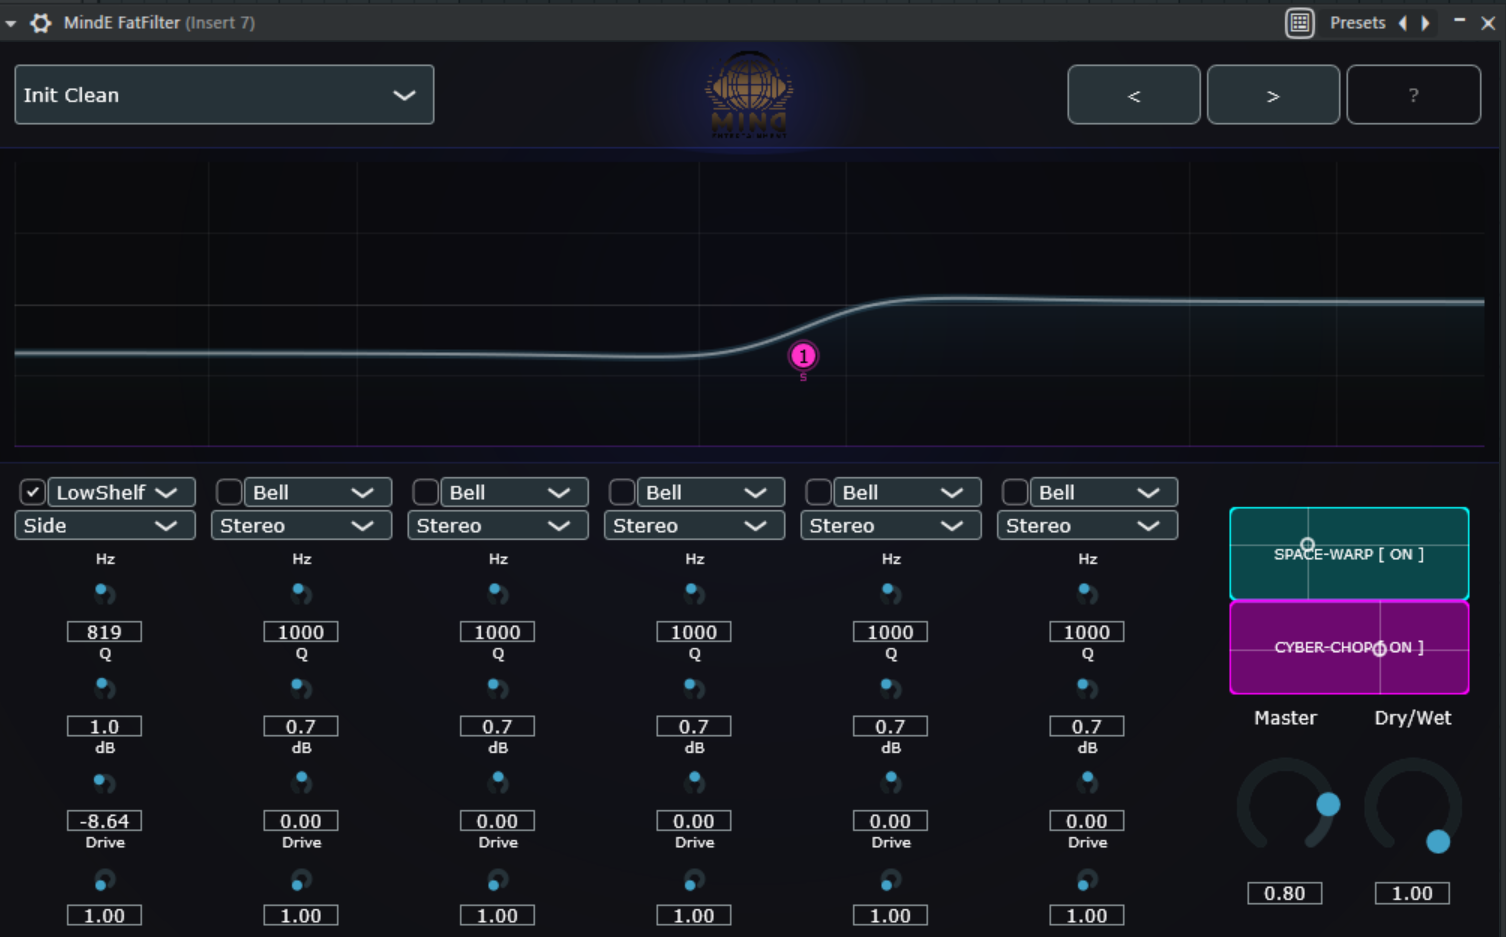
1. The user interface (GUI)
The interactive display is the heart of the plugin. Here, you can not only visualize the sound, but also actively shape it.
Interaction in the graph:
-
Double-click: Creates a new filter band at the mouse position or disables an existing band.
-
Drag and drop: Move the nodes (handles) to control frequency (X-axis) and gain (Y-axis) simultaneously.
-
Mouse wheel: Changes the quality (Q factor) of the selected band. A high Q value makes the filter narrowband (surgical), a low value makes it broadband (musical).
-
Analyzer: The illuminated area in the background displays the input signal in real time. Use it to visually identify disturbing frequencies.
2. The filter bands & routing
Each of the 6 bands is a standalone processor with special capabilities.
Filter types:
-
Bell: Standard for boosts and cuts.
-
High/Low Shelf: Raises or lowers all frequencies above/below a point evenly.
-
High/Low Pass (Cut): Completely cuts out unwanted low or high frequencies.
-
Notch: Eliminates a very specific frequency (ideal for annoying resonances).
M/S (Mid/Side) Processing:
This is the "secret recipe" for professional mixes:
-
Stereo: Affects the entire signal.
-
Mid: Only processes the middle (mono portion). Ideal for emphasizing the kick or vocals without affecting the panorama.
-
Side: Only processes the sides (stereo portion). Perfect for making a mix wider without "mudding up" the midrange.
Pro-Band Saturation (Drive):
Each band has its own Drive control. It adds harmonic distortion (saturation). When you boost a band and turn up the Drive, the boost not only sounds louder, but also "thicker" and more characterful.
3. The Modulation Engine (Phase 5)
Use the Mod Rate and Mod Depth parameters to control the global after-effects:
-
Space Warp (Frequency Shifter):
-
Creates metallic, shimmering textures.
-
Use: Great for sci-fi sounds, soundscapes, or to bring static synths to life.
-
Cyber-Chop (Rhythmic Gate):
-
Chops the signal rhythmically.
-
Use: Turn pads into percussive rhythms or create "gitch" effects on vocals.
4. Application by instrument group
Drums
-
Kick drum: Use a mid-band at approx.
 with saturation for massive punch. Set a high pass at
  to remove unnecessary sub-garbage.
 -
Snare: A boost at
 in stereo mode brings the "crack" to the front. Use saturation to make the snare more present.
 -
Overheads: Use side mode to boost the highs (
 ). This makes the drums extremely wide without losing the snare in the middle.
Bass
-
Low end: Use a mid band for the bass fundamental.
-
Definition: A small cut at
 removes the "muffled" sound.
 -
Saturation: Turn up the drive on the lower bands so that the bass is also audible on small speakers (smartphone, laptop) through the overtones.
Vocals
-
Air: A high shelf in stereo mode from
 gives the voice a sparkle.
 -
Presence: Raise the mids slightly
 slightly.
 -
Space Warp: Use a minimal mod depth in Warp mode for a subtle "chorus"-like effect that thickens the voice.
Mix Bus (Mastering)
-
Mono Check: Use a high pass in side mode at approx.
 . This ensures that all low frequencies are mono – essential for club systems and vinyl.
 -
Glow: Use minimal saturation on the high shelves to give the entire mix an "expensive" analog polish.
-
Cyber-Chop: Use Chop mode with
 Dry/Wet only as a creative effect in transitions (buildups).
5. Pro tip: Audio-Reactive Design
Pay attention to the glow of the UI. If the curves are pulsing strongly, the plugin is telling you that the saturation and master output are working hard. Use your eyes to help, but always rely on your ears!