MindE GoldenFlame
1. Introduction
Welcome to MindE GoldenFlame. This plugin is not your average distortion pedal, but rather a high-end refinement tool. It is based on the idea of "melting" and reshaping an audio signal in four stages to give digital recordings the character, warmth, and density of analog equipment.
At its heart is the modular architecture: you can determine whether the signal is saturated first and then filtered, or vice versa.
2. The 4 elements (modules)
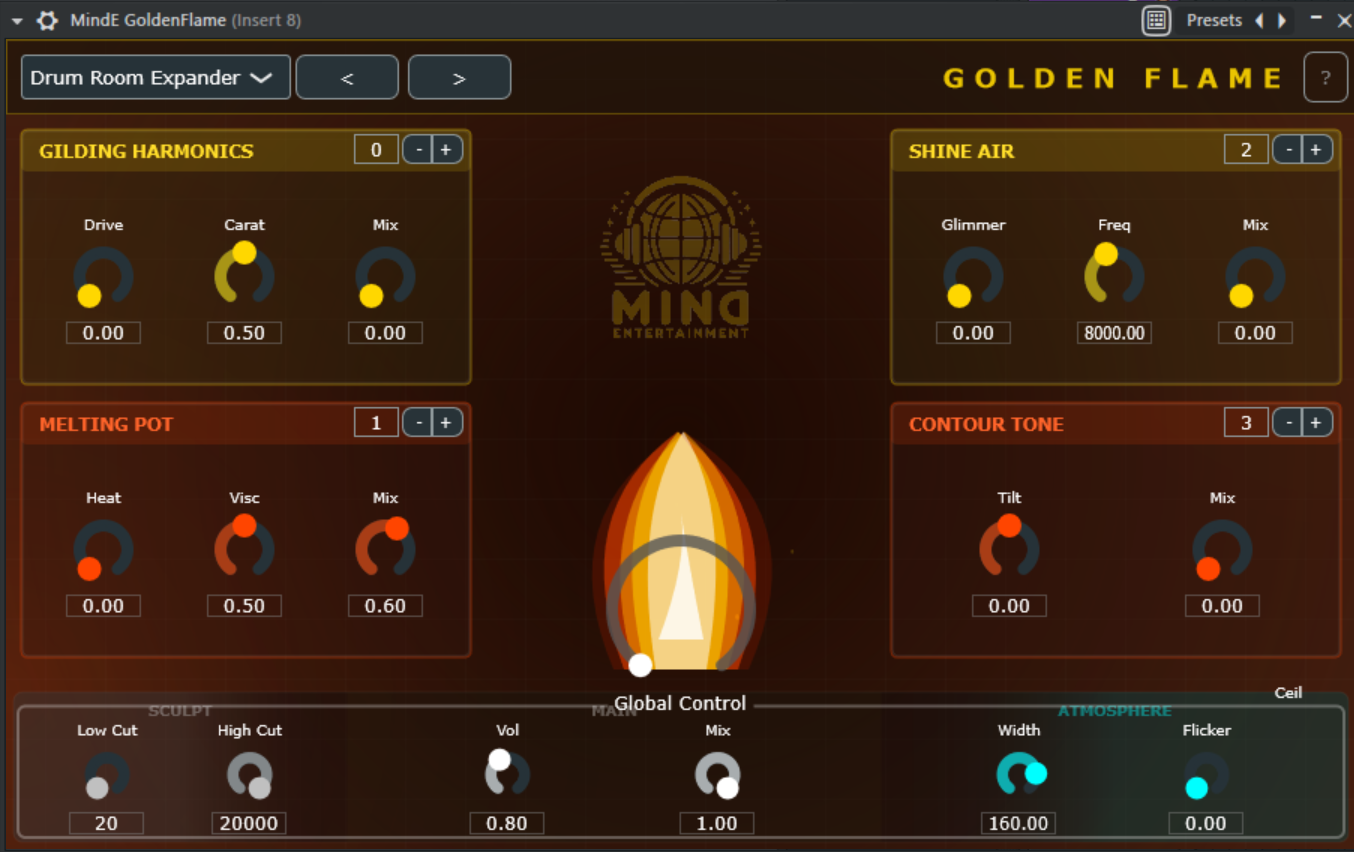
Each module has a small order control (0-3) in the upper right corner. This allows you to determine where this module is located in the signal chain.
🔥 GILDING (Harmonics)
The refiner.
This module uses mathematical polynomials (Chebyshev) to generate artificial harmonics that were not present in the original signal.
-
Drive: Determines how strongly the signal is driven into the generator.
-
Carat (the most important control): Controls the "purity" of the gold.
-
Left (0%): Dominance of even harmonics (2nd order). Sounds warm, fat, and tubular.
-
Right (100%): Dominance of odd harmonics (3rd order). Sounds more aggressive, edgy, and "transistor-like."
-
Mix: Mixes the overtones into the original signal.
🌋 MELTING (Saturation)
The furnace.
This is where loudness and density are created. We use a sigmoid curve that softly rounds off audio signals (soft clipping), similar to analog tape being driven into the red.
-
Heat: The input gain into the saturation stage. More heat = more distortion.
-
Visc (Viscosity): The "stickiness." A special filter that smooths the transients before saturation. High viscosity provides a thick, creamy sound ("liquid gold"), low values let the "snap" through.
-
Mix: Parallel processing control.
✨ SHINE (Air)
The shine.
A psychoacoustic processor for the high frequency range. Unlike an EQ, which only makes highs louder, SHINE generates new overtones in the top end through selective distortion.
-
Glimmer: The intensity of the high-frequency enhancement.
-
Freq: The frequency at which the effect begins (e.g., from 8kHz for a pure "air" effect).
-
Mix: Dosage of the effect.
🌑 CONTOUR (Tone)
The shape.
A musical tilt equalizer for adjusting the spectral balance in a flash.
-
Tilt:
-
To the left: The signal becomes darker (bass boost/treble cut).
-
To the right: The signal becomes brighter (bass cut/treble boost).
-
Mix: Strength of the EQ curve.
3. Areas of application by instrument group
How can you best use GoldenFlame? Here are some proven strategies:
🥁 Drums & Percussion
-
Goal: More punch, density, and an expensive high-end shine on cymbals.
-
Setting:
-
Use Melting with high Heat but moderate Mix (New York Compression effect).
-
Set Visc to about 30% to slightly soften the hard transients of the snare without killing them.
-
Turn up Shine on hi-hats to replace digital "mud" with silky presence.
🎸 Bass & Synth Bass
-
Goal: Assertiveness on small speakers (cell phone/laptop).
-
Setting:
-
Gilding is your best friend here. Turn Carat up to about 60-70% (odd harmonics). This makes the bass audible in the midrange without just making the sub-bass louder.
-
Use Contour with a slight tilt to the left to strengthen the foundation.
🎤 Vocals
-
Goal: "Expensive" pop sound that stands out in the mix.
-
Setting:
-
Shine is essential here. Set Freq to approx. 6-10kHz and Glimmer to 20%. This brings the "air" that you know from expensive condenser microphones.
-
Use Gilding with Carat set to 0-20% (tube warmth) to give thin voices more body.
🎹 Synths & Pads
-
Goal: Analog warmth and texture.
-
Setting:
-
Experiment with the order: First turn on Melting (to break up the sound) and then Contour (to make it dark again). This sounds like an old sampler.
-
Use Global Flame Intensity to give the sound a lively, flickering saturation.
🎚️ Master Bus / Sum
-
Goal: "Glue" (cohesion) and loudness.
-
Setting:
-
Caution! All mix controls should remain below 30%.
-
Use the "Golden Master" preset.
-
A touch of Gilding (Carat 50%) acts like a "varnish" over the entire mix.
4. Tutorial: How do I create the perfect sound?
If you have a flat, boring signal, follow this 4-step recipe ("The Golden Recipe"):
Step 1: The foundation (Contour)
Before you distort, decide on the direction. Is the signal too dull? Turn Contour Tilt slightly to the right. Is it too harsh? To the left.
Tip: It's often worth setting Contour to position 0 (right at the beginning).
Step 2: The refinement (Gilding)
Now we add character. Turn Gilding Mix to 100% and play with Carat until the tone has the right "color." Then turn the mix back to about 40% so that it sounds natural.
Step 3: Melting
Now we'll make it loud. Turn up Heat until you hear the signal crackling or compressing softly. Then turn up Visc (viscosity) to transform this crackling into a soft saturation. The signal should now sound significantly "fatter."
Step 4: The finish (Shine)
Finally, we add the "highlight." Carefully turn up Shine until the signal sounds "expensive." If it starts to hiss (sibilants), you've gone too far—turn it back down a bit.
Global:
Use the Flame Intensity control in the middle for the final "mojo." Watch the flame animation: when it glows gold-white, you have reached a high level of saturation.